> ## Documentation Index
> Fetch the complete documentation index at: https://docs.dezerx.com/llms.txt
> Use this file to discover all available pages before exploring further.
# Pterodactyl
> Follow this docs to setup Pterodactyl!
## Configuring Pterodactyl.
Open the Pterodactyl configuration file by running the following command:
```bash theme={null}
sudo nano /etc/pterodactyl/config.yml
```
Find the following line in the configuration file:
```yaml theme={null}
allowed_origins: []
```
Modify it to include the allowed origins for Spartan:
```yaml theme={null}
allowed_origins:
- https://dash.example.com
- http://dash.example.com
```
Replace `https://dash.example.com` and `http://dash.example.com` with your actual dashboard URLs.
After saving the configuration changes, restart the Wings service to apply them:
```bash theme={null}
sudo systemctl restart wings
```
## Configure Pterodactyl in Spartan
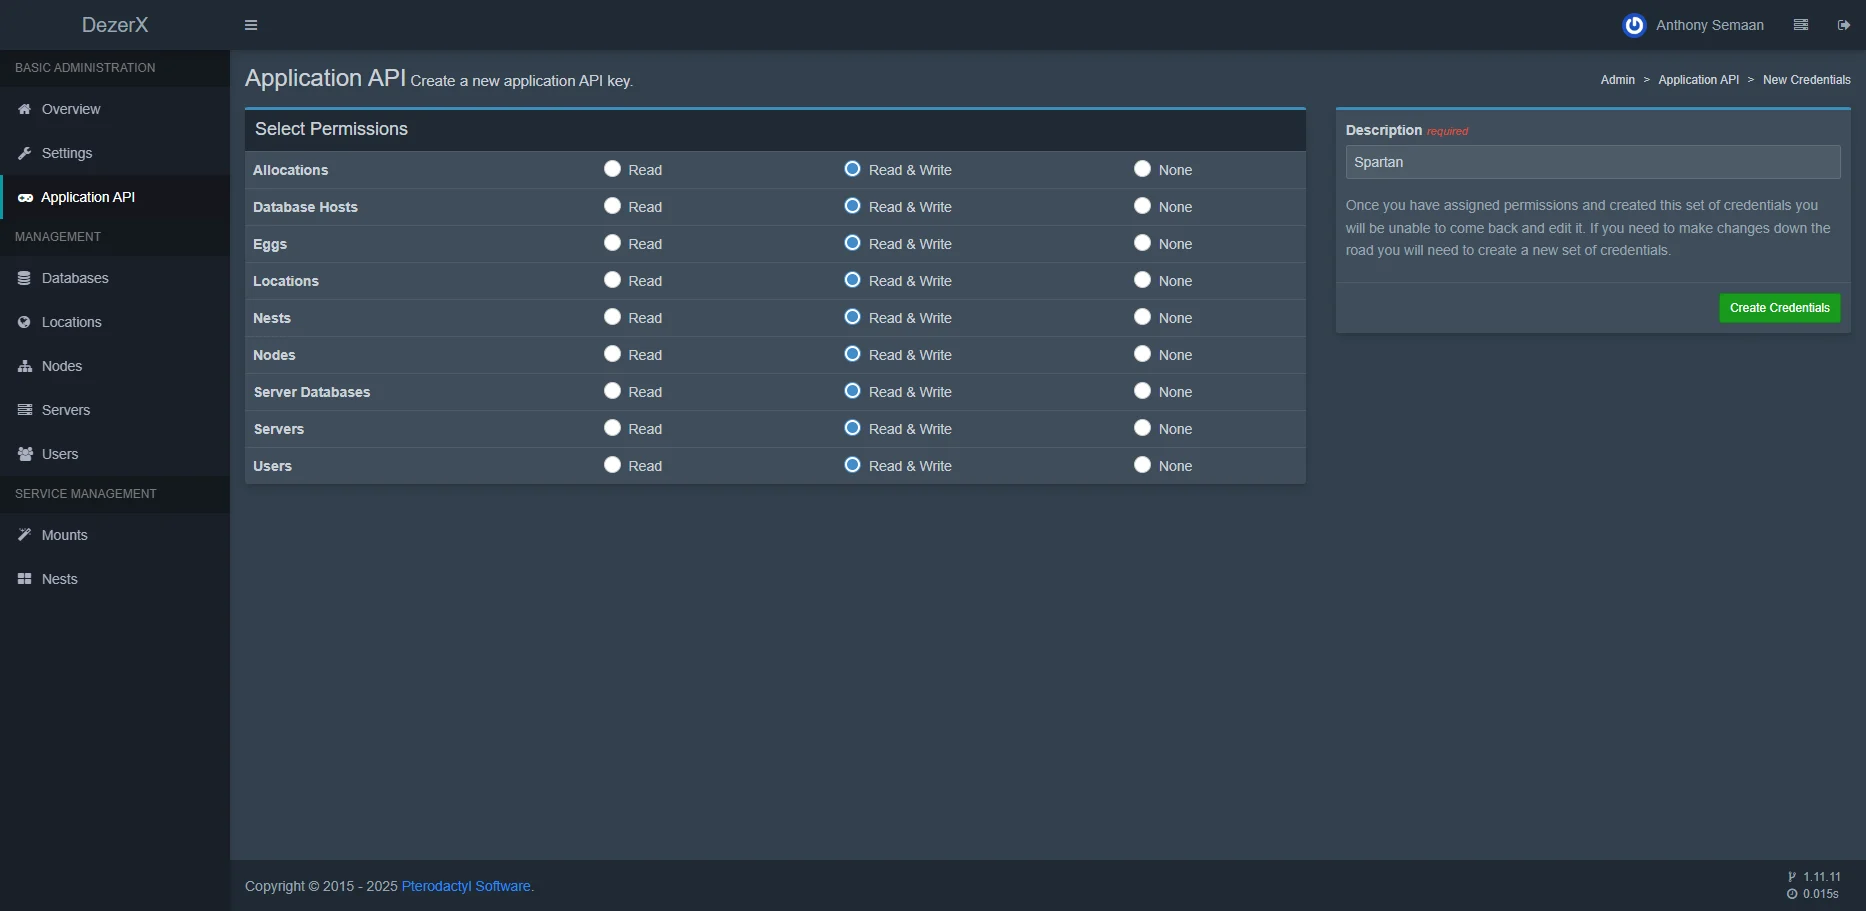
* In your Pterodactyl admin panel, navigate to the Application API section.
* Generate a new API key with appropriate permissions.
* Copy the generated key.
 * Navigate to your Pterodactyl account settings.
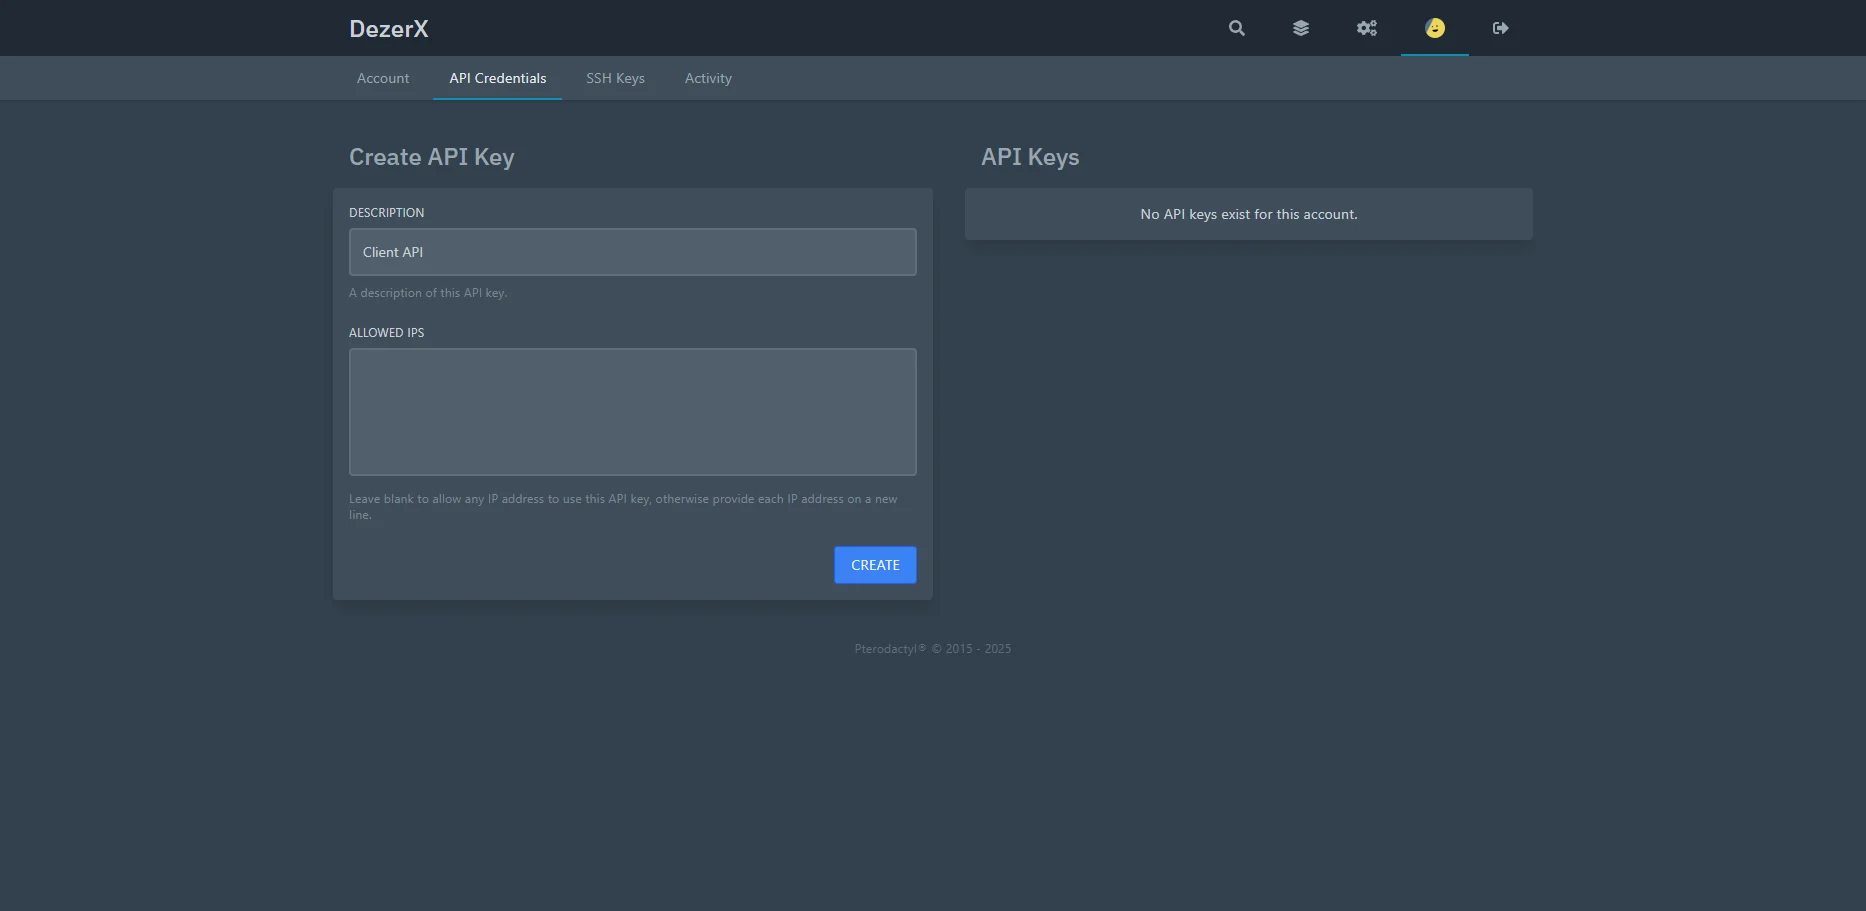
* Go to the API Credentials section.
* Create a new client API key.
* Copy the generated key.
* Navigate to your Pterodactyl account settings.
* Go to the API Credentials section.
* Create a new client API key.
* Copy the generated key.
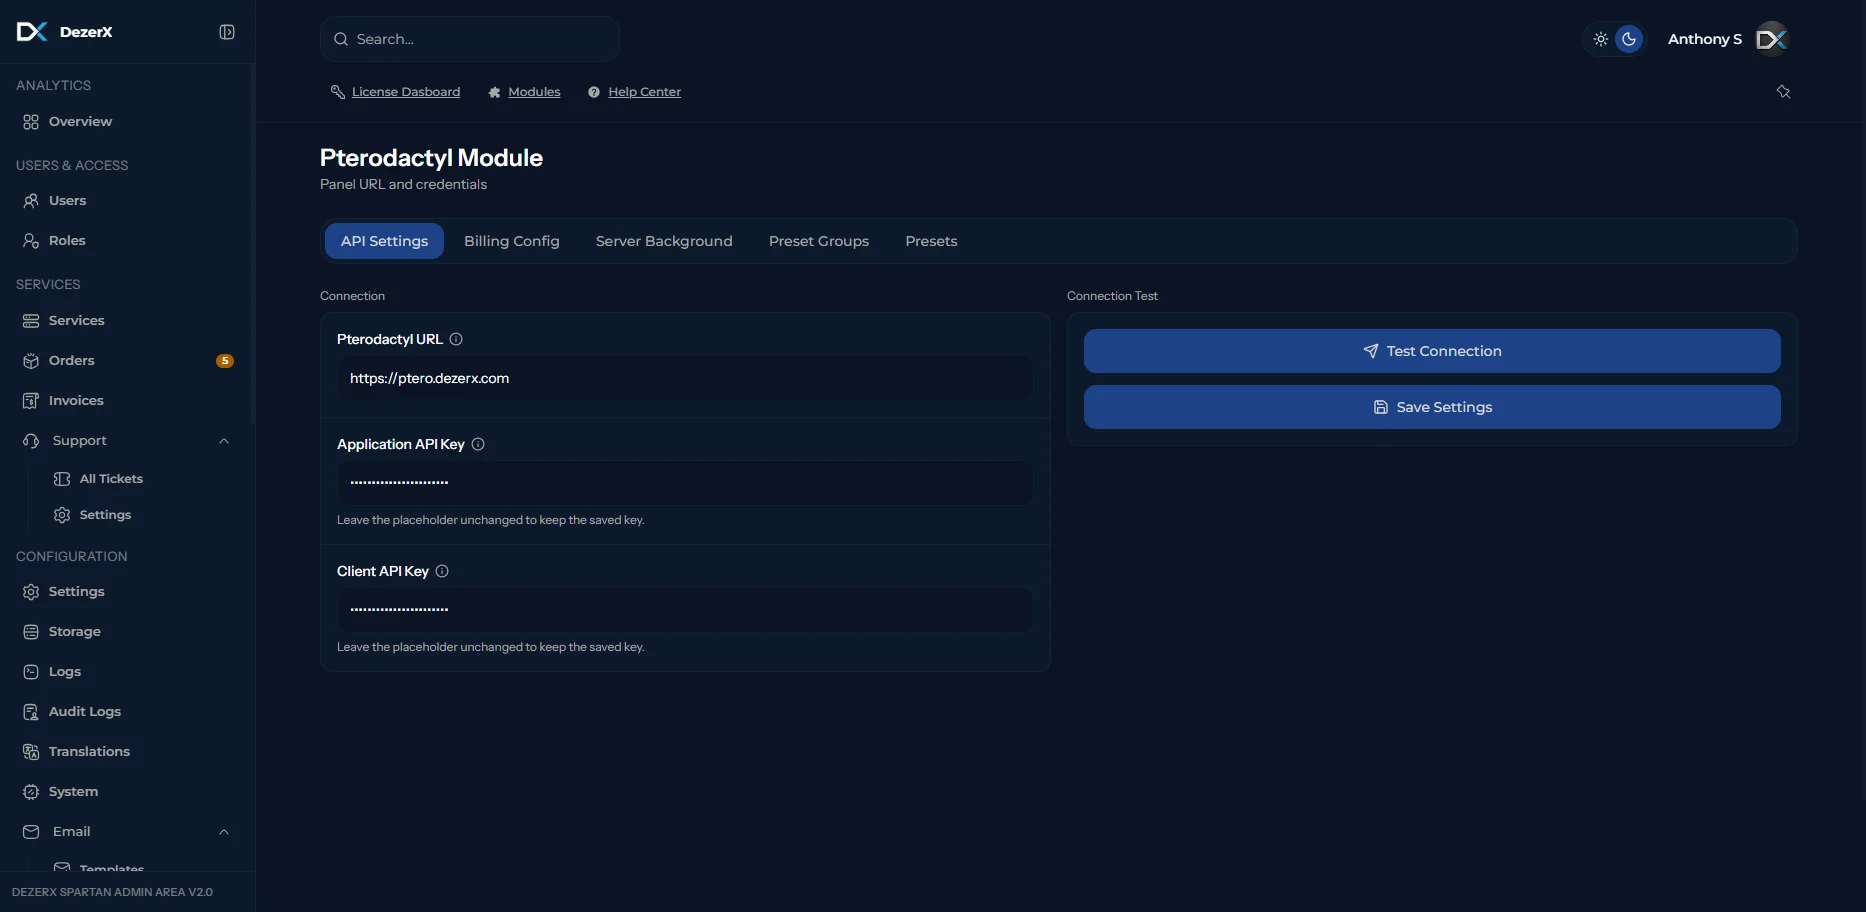
 * Paste the Application API key in the designated field.
* Paste the Client API key in the designated field.
* Enter your Pterodactyl panel URL.
* Click the **Test Connection** button to verify the setup.
* Paste the Application API key in the designated field.
* Paste the Client API key in the designated field.
* Enter your Pterodactyl panel URL.
* Click the **Test Connection** button to verify the setup.
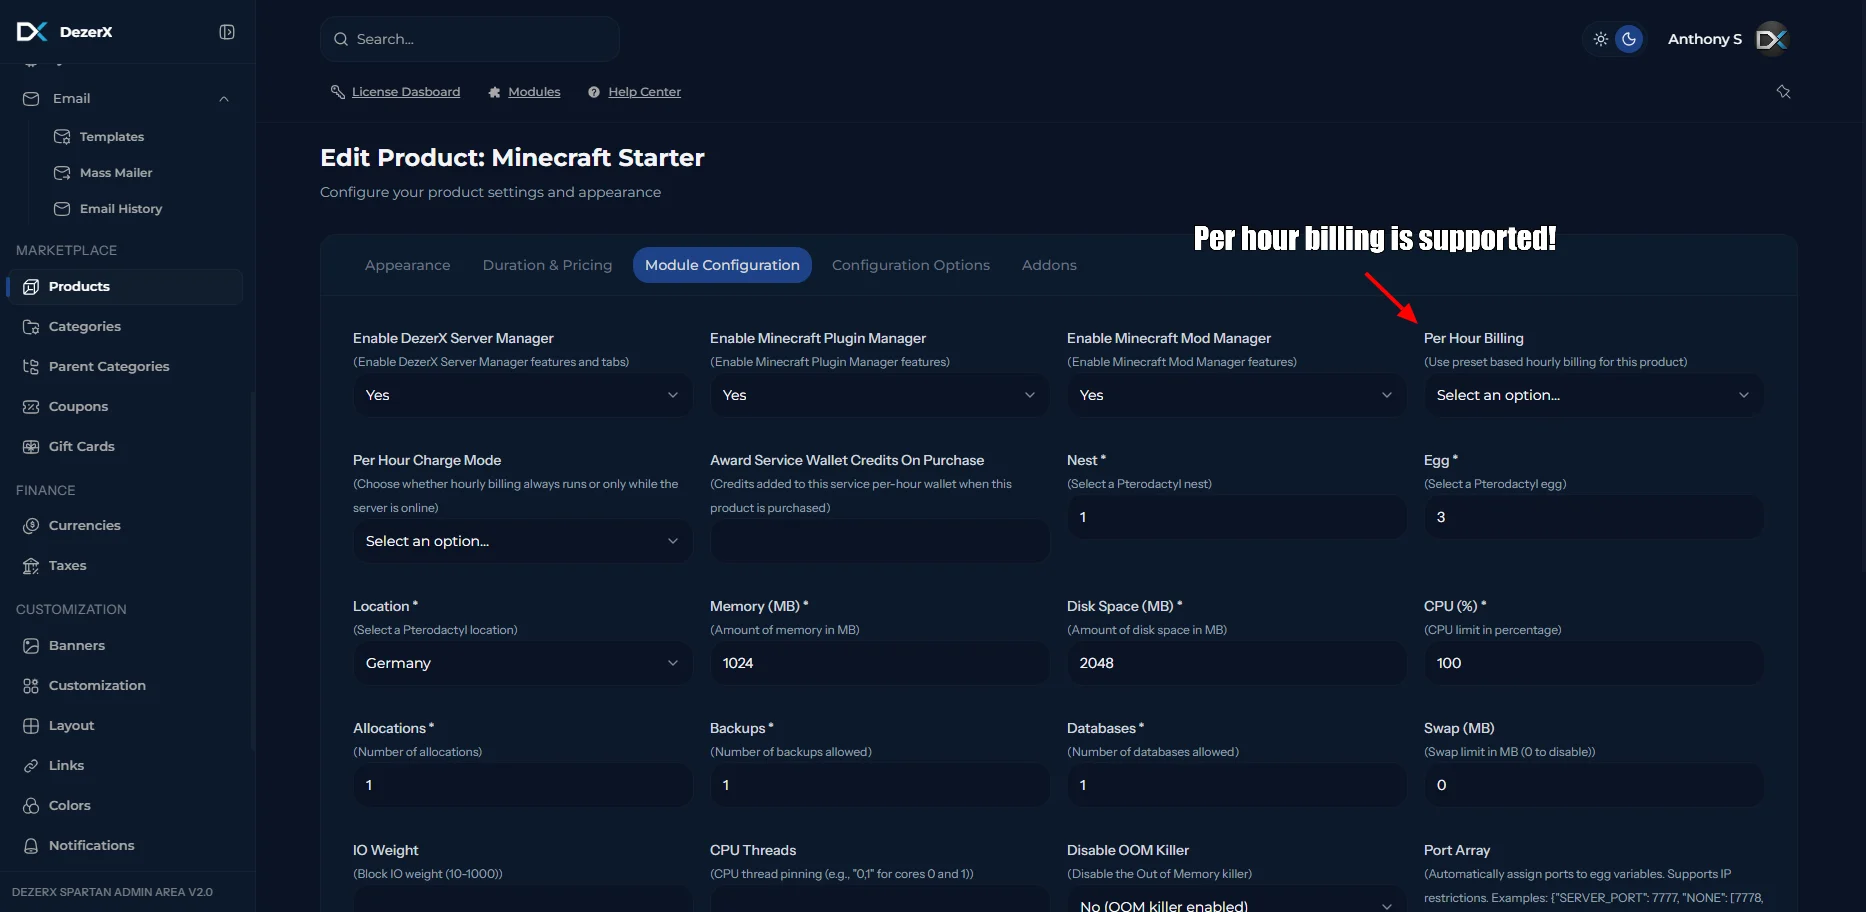
 Use the product configuration options shown below:
 ## Troubleshooting
If you encounter any issues:
* Verify that your API keys have the correct permissions
* Ensure your Pterodactyl panel URL is correct and accessible
* Check that the `allowed_origins` configuration includes your Spartan dashboard URL
* Make sure the Wings service has been restarted after configuration changes
***
# Port Array Configuration Guide
## Introduction
The **Port Array** feature allows you to automatically assign specific ports (and optionally restrict them to specific IPs) when creating Pterodactyl servers. This is useful for:
* Reserving specific IPs for specific products
* Preventing IP conflicts between different products
* Managing multiple dedicated IPs on the same node
* Allocating multiple ports to a single server
***
## Basic Concepts
### What happens when you configure a port array?
1. **Ports are allocated** to the server from Pterodactyl
2. **Environment variables are created** for the egg (except for "NONE")
3. **IP restrictions are enforced** if specified
### Port Allocation Fallback Logic
When a requested port is not available, the system uses a **three-tier fallback strategy**:
1. **Try exact port first** - Attempts to allocate the exact port you specified (e.g., 25565)
2. **Fallback to next higher port** - If exact port is unavailable, finds the next available port **higher** than requested
* Sorts available higher ports in ascending order
* Selects the **lowest higher port**
* Example: If 25565 is taken, might allocate 25568, 25570, or 26668 (whichever is next available)
3. **Last resort** - Allocates any available port on the node
**Important Notes:**
* The system does NOT automatically increment by 1 (25565 → 25566)
* It finds whatever higher port is **actually available** in the node's allocations
* With IP restrictions, the same logic applies but only considers ports on the allowed IPs
### Two types of port assignments:
| Type | Format | Creates Environment Variable? |
| ------------------ | -------------------------- | ----------------------------------- |
| **Named** | `"SERVER_PORT": "25565"` | ✅ Yes - Creates `SERVER_PORT=25565` |
| **Unnamed (NONE)** | `"NONE": ["7778", "7779"]` | ❌ No - Just allocates the ports |
***
## Syntax & Format
### Basic Structure
```json theme={null}
{
"VARIABLE_NAME": PORT_SPECIFICATION,
"ANOTHER_VARIABLE": PORT_SPECIFICATION,
"NONE": [PORT_SPECIFICATION, PORT_SPECIFICATION]
}
```
### Port Specification Formats
| Format | Example | Description |
| ------------------- | ------------------------------------------------ | --------------------------------------------------------------- |
| **Port only** | `25565` | Any available IP with this port (or next higher if unavailable) |
| **Single IP** | `"192.168.1.100:25565"` | Specific IP with this port (or next higher on same IP) |
| **Multiple IPs** | `"192.168.1.100,192.168.1.101:25565"` | First available from these IPs (tries exact port, then higher) |
| **Port array** | `[25565, 25566]` | Multiple ports (any IP, with fallback per port) |
| **IP + Port array** | `["192.168.1.100:25565", "192.168.1.100:25566"]` | Multiple specific IP:port combinations (with fallback per port) |
**Note:** All formats support automatic fallback to next available higher port if the exact requested port is unavailable.
### String vs Array
* **String**: Allocate ONE port
```json theme={null}
"SERVER_PORT": "192.168.1.100:25565"
```
* **Array**: Allocate MULTIPLE ports
```json theme={null}
"NONE": ["192.168.1.100:7778", "192.168.1.100:7779"]
```
***
## Troubleshooting
### Understanding Port Fallback Behavior
**Question:** "I requested port 25565 but got 25570 instead, is this a bug?"
**Answer:** No, this is expected behavior! The system uses intelligent port fallback:
1. **Tries exact port first** (25565)
2. **If unavailable**, finds next higher port (25570, 26000, 26668, etc.)
3. **Environment variable reflects actual port** assigned
**Example Scenario:**
```json theme={null}
{
"SERVER_PORT": "192.168.1.100:25565"
}
```
**If ports on 192.168.1.100 are:**
* 25565 ❌ (assigned)
* 25566 ❌ (assigned)
* 25567 ❌ (assigned)
* 25570 ✅ (available) ← **System allocates this**
* 26668 ✅ (available)
**Result:** `SERVER_PORT=25570` (not 25565, not 25566, but 25570 - the lowest available higher port)
**When does it fail?** Only when **no ports are available** on the specified IP(s), not just when the exact port is taken.
***
### Error: "Could not find a port to assign"
**Possible causes:**
1. The specified IP doesn't exist on the node
2. **ALL ports** on that IP are already assigned (not just the requested port)
3. No available allocations on the node at all
**Solutions:**
* Check Pterodactyl → Nodes → Allocations
* Ensure the IP is created and has **any** unassigned ports (fallback will handle different port numbers)
* Add more port allocations to the IP
* Use multiple IP options: `"192.168.1.100,192.168.1.101:25565"`
## Troubleshooting
If you encounter any issues:
* Verify that your API keys have the correct permissions
* Ensure your Pterodactyl panel URL is correct and accessible
* Check that the `allowed_origins` configuration includes your Spartan dashboard URL
* Make sure the Wings service has been restarted after configuration changes
***
# Port Array Configuration Guide
## Introduction
The **Port Array** feature allows you to automatically assign specific ports (and optionally restrict them to specific IPs) when creating Pterodactyl servers. This is useful for:
* Reserving specific IPs for specific products
* Preventing IP conflicts between different products
* Managing multiple dedicated IPs on the same node
* Allocating multiple ports to a single server
***
## Basic Concepts
### What happens when you configure a port array?
1. **Ports are allocated** to the server from Pterodactyl
2. **Environment variables are created** for the egg (except for "NONE")
3. **IP restrictions are enforced** if specified
### Port Allocation Fallback Logic
When a requested port is not available, the system uses a **three-tier fallback strategy**:
1. **Try exact port first** - Attempts to allocate the exact port you specified (e.g., 25565)
2. **Fallback to next higher port** - If exact port is unavailable, finds the next available port **higher** than requested
* Sorts available higher ports in ascending order
* Selects the **lowest higher port**
* Example: If 25565 is taken, might allocate 25568, 25570, or 26668 (whichever is next available)
3. **Last resort** - Allocates any available port on the node
**Important Notes:**
* The system does NOT automatically increment by 1 (25565 → 25566)
* It finds whatever higher port is **actually available** in the node's allocations
* With IP restrictions, the same logic applies but only considers ports on the allowed IPs
### Two types of port assignments:
| Type | Format | Creates Environment Variable? |
| ------------------ | -------------------------- | ----------------------------------- |
| **Named** | `"SERVER_PORT": "25565"` | ✅ Yes - Creates `SERVER_PORT=25565` |
| **Unnamed (NONE)** | `"NONE": ["7778", "7779"]` | ❌ No - Just allocates the ports |
***
## Syntax & Format
### Basic Structure
```json theme={null}
{
"VARIABLE_NAME": PORT_SPECIFICATION,
"ANOTHER_VARIABLE": PORT_SPECIFICATION,
"NONE": [PORT_SPECIFICATION, PORT_SPECIFICATION]
}
```
### Port Specification Formats
| Format | Example | Description |
| ------------------- | ------------------------------------------------ | --------------------------------------------------------------- |
| **Port only** | `25565` | Any available IP with this port (or next higher if unavailable) |
| **Single IP** | `"192.168.1.100:25565"` | Specific IP with this port (or next higher on same IP) |
| **Multiple IPs** | `"192.168.1.100,192.168.1.101:25565"` | First available from these IPs (tries exact port, then higher) |
| **Port array** | `[25565, 25566]` | Multiple ports (any IP, with fallback per port) |
| **IP + Port array** | `["192.168.1.100:25565", "192.168.1.100:25566"]` | Multiple specific IP:port combinations (with fallback per port) |
**Note:** All formats support automatic fallback to next available higher port if the exact requested port is unavailable.
### String vs Array
* **String**: Allocate ONE port
```json theme={null}
"SERVER_PORT": "192.168.1.100:25565"
```
* **Array**: Allocate MULTIPLE ports
```json theme={null}
"NONE": ["192.168.1.100:7778", "192.168.1.100:7779"]
```
***
## Troubleshooting
### Understanding Port Fallback Behavior
**Question:** "I requested port 25565 but got 25570 instead, is this a bug?"
**Answer:** No, this is expected behavior! The system uses intelligent port fallback:
1. **Tries exact port first** (25565)
2. **If unavailable**, finds next higher port (25570, 26000, 26668, etc.)
3. **Environment variable reflects actual port** assigned
**Example Scenario:**
```json theme={null}
{
"SERVER_PORT": "192.168.1.100:25565"
}
```
**If ports on 192.168.1.100 are:**
* 25565 ❌ (assigned)
* 25566 ❌ (assigned)
* 25567 ❌ (assigned)
* 25570 ✅ (available) ← **System allocates this**
* 26668 ✅ (available)
**Result:** `SERVER_PORT=25570` (not 25565, not 25566, but 25570 - the lowest available higher port)
**When does it fail?** Only when **no ports are available** on the specified IP(s), not just when the exact port is taken.
***
### Error: "Could not find a port to assign"
**Possible causes:**
1. The specified IP doesn't exist on the node
2. **ALL ports** on that IP are already assigned (not just the requested port)
3. No available allocations on the node at all
**Solutions:**
* Check Pterodactyl → Nodes → Allocations
* Ensure the IP is created and has **any** unassigned ports (fallback will handle different port numbers)
* Add more port allocations to the IP
* Use multiple IP options: `"192.168.1.100,192.168.1.101:25565"`