Configuring Pelican.
1
Open the Pelican configuration
Open the Pelican configuration file by running the following command:
2
Configure allowed origins
Find the following line in the configuration file:Modify it to include the allowed origins for Spartan:
Replace
https://dash.example.com and http://dash.example.com with your actual dashboard URLs.3
Restart Wings
After saving the configuration changes, restart the Wings service to apply them:
Configure Pelican in Spartan
1
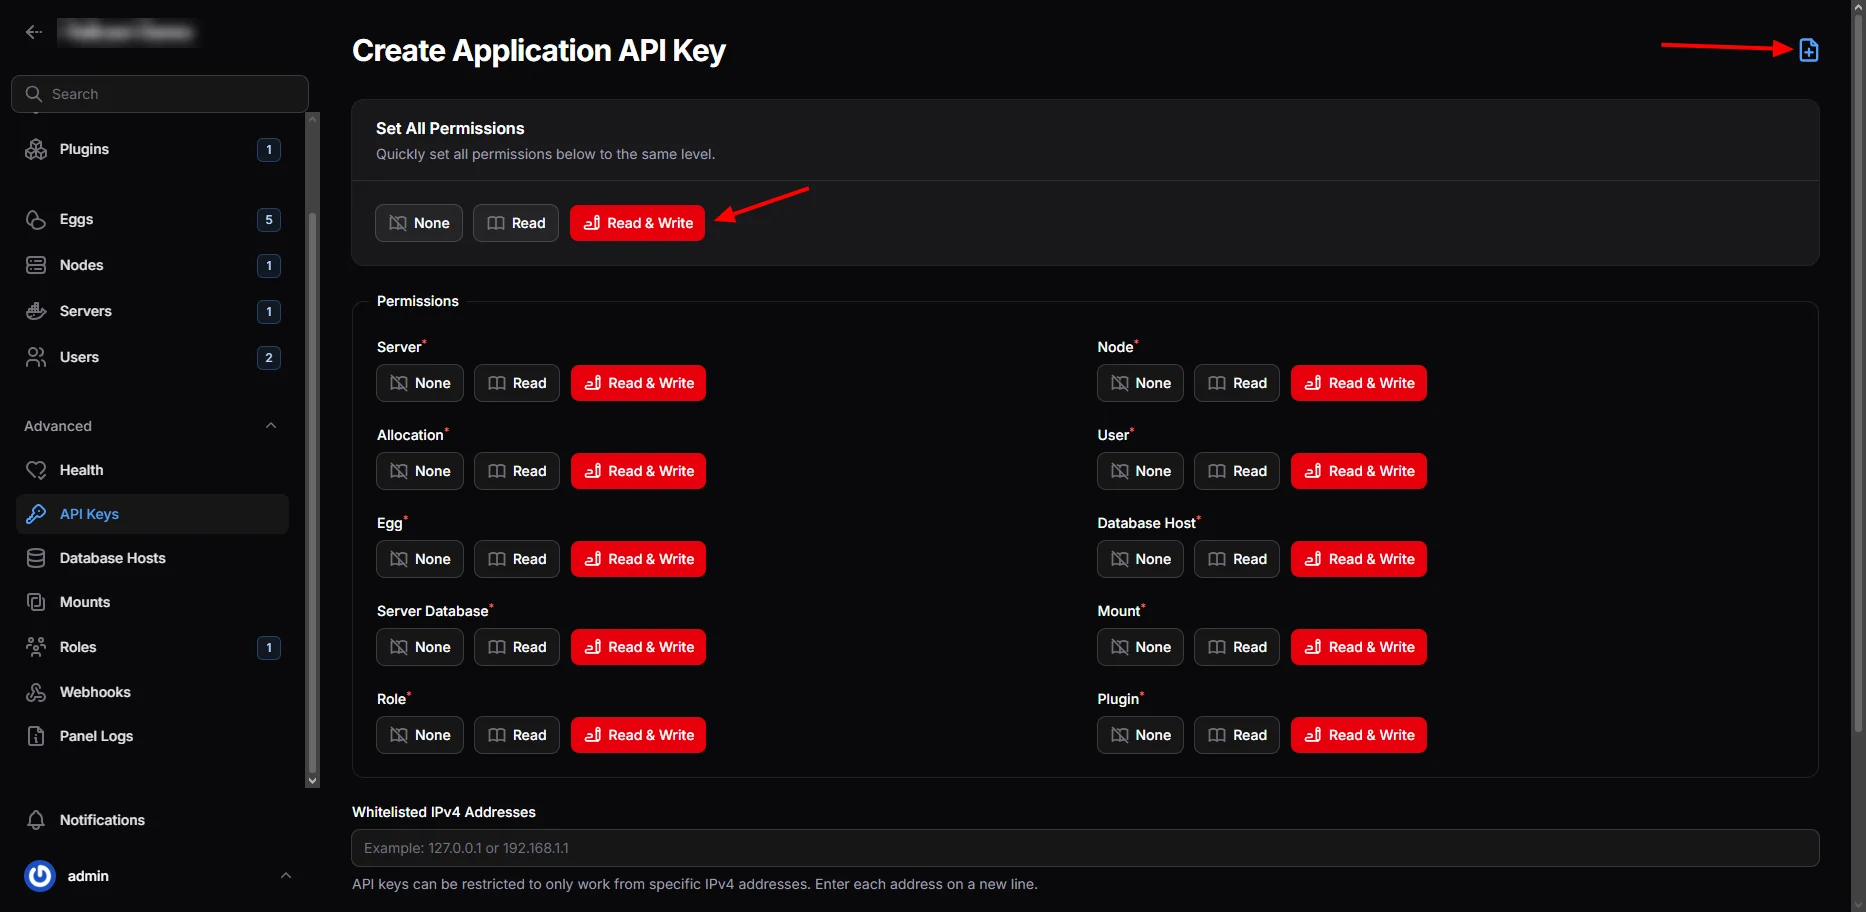
Get an Application API key
- In your Pelican admin panel, navigate to the Application API section.
- Generate a new API key with appropriate permissions.
-
Copy the generated key.
2
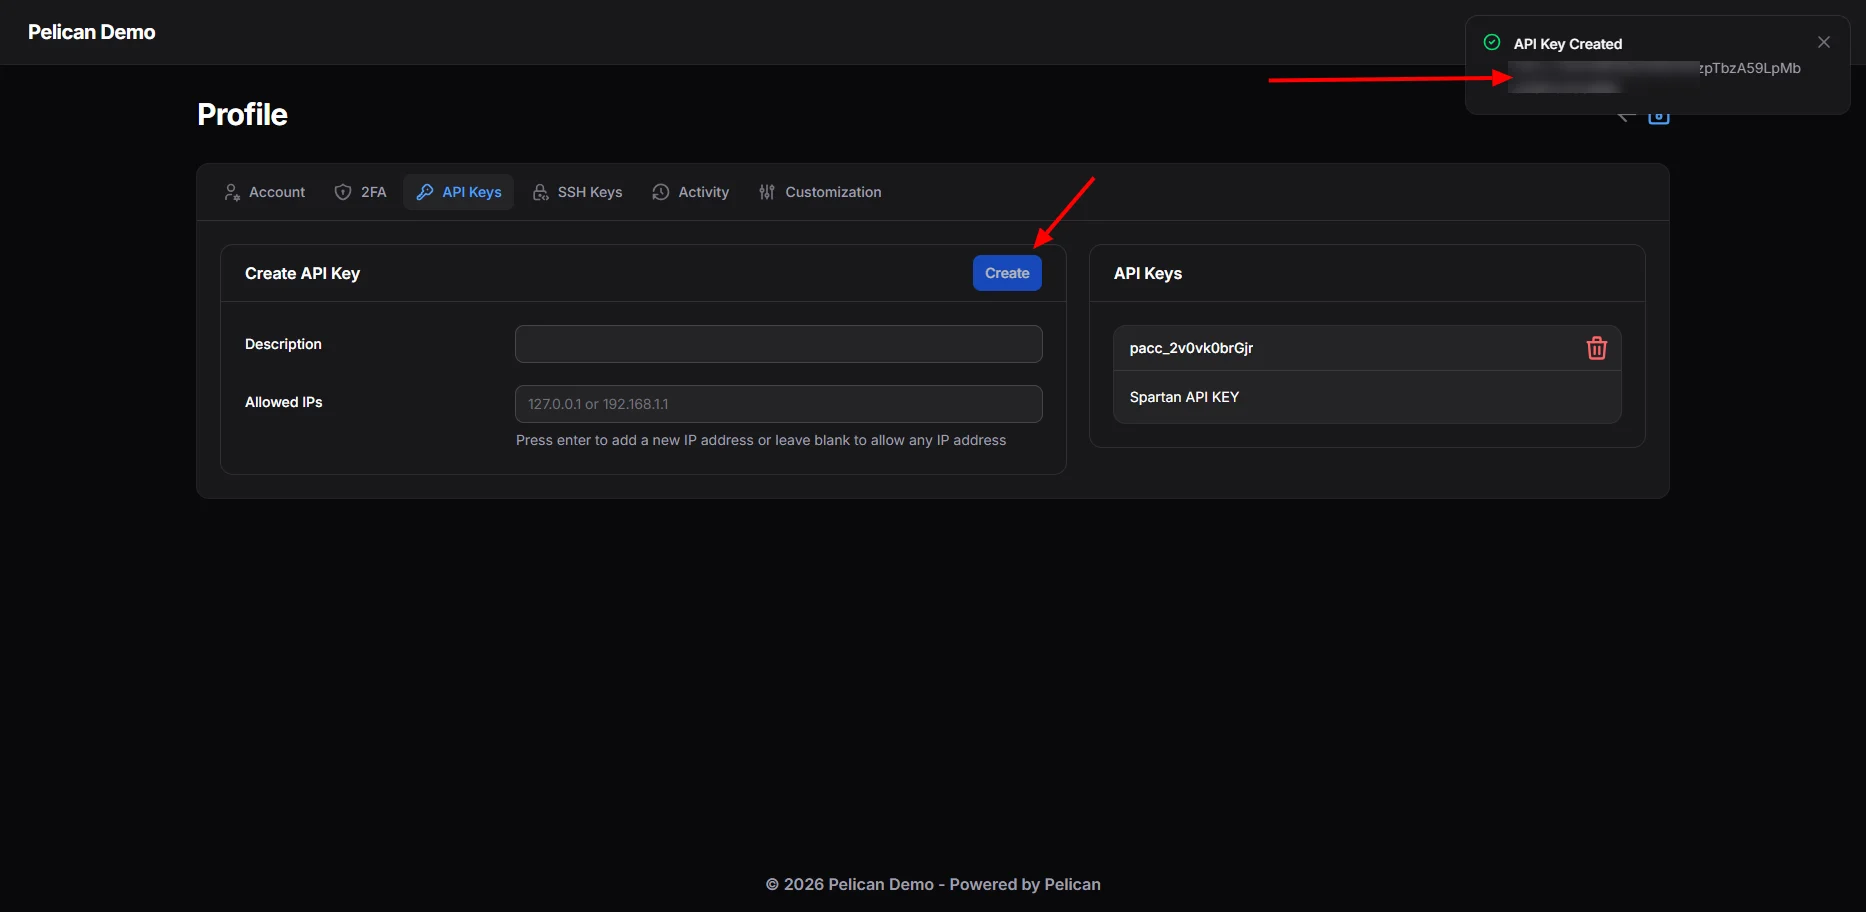
Get a Client API key
- Navigate to your Pterodactyl account settings.
- Go to the API Credentials section.
- Create a new client API key.
-
Copy the generated key.
3
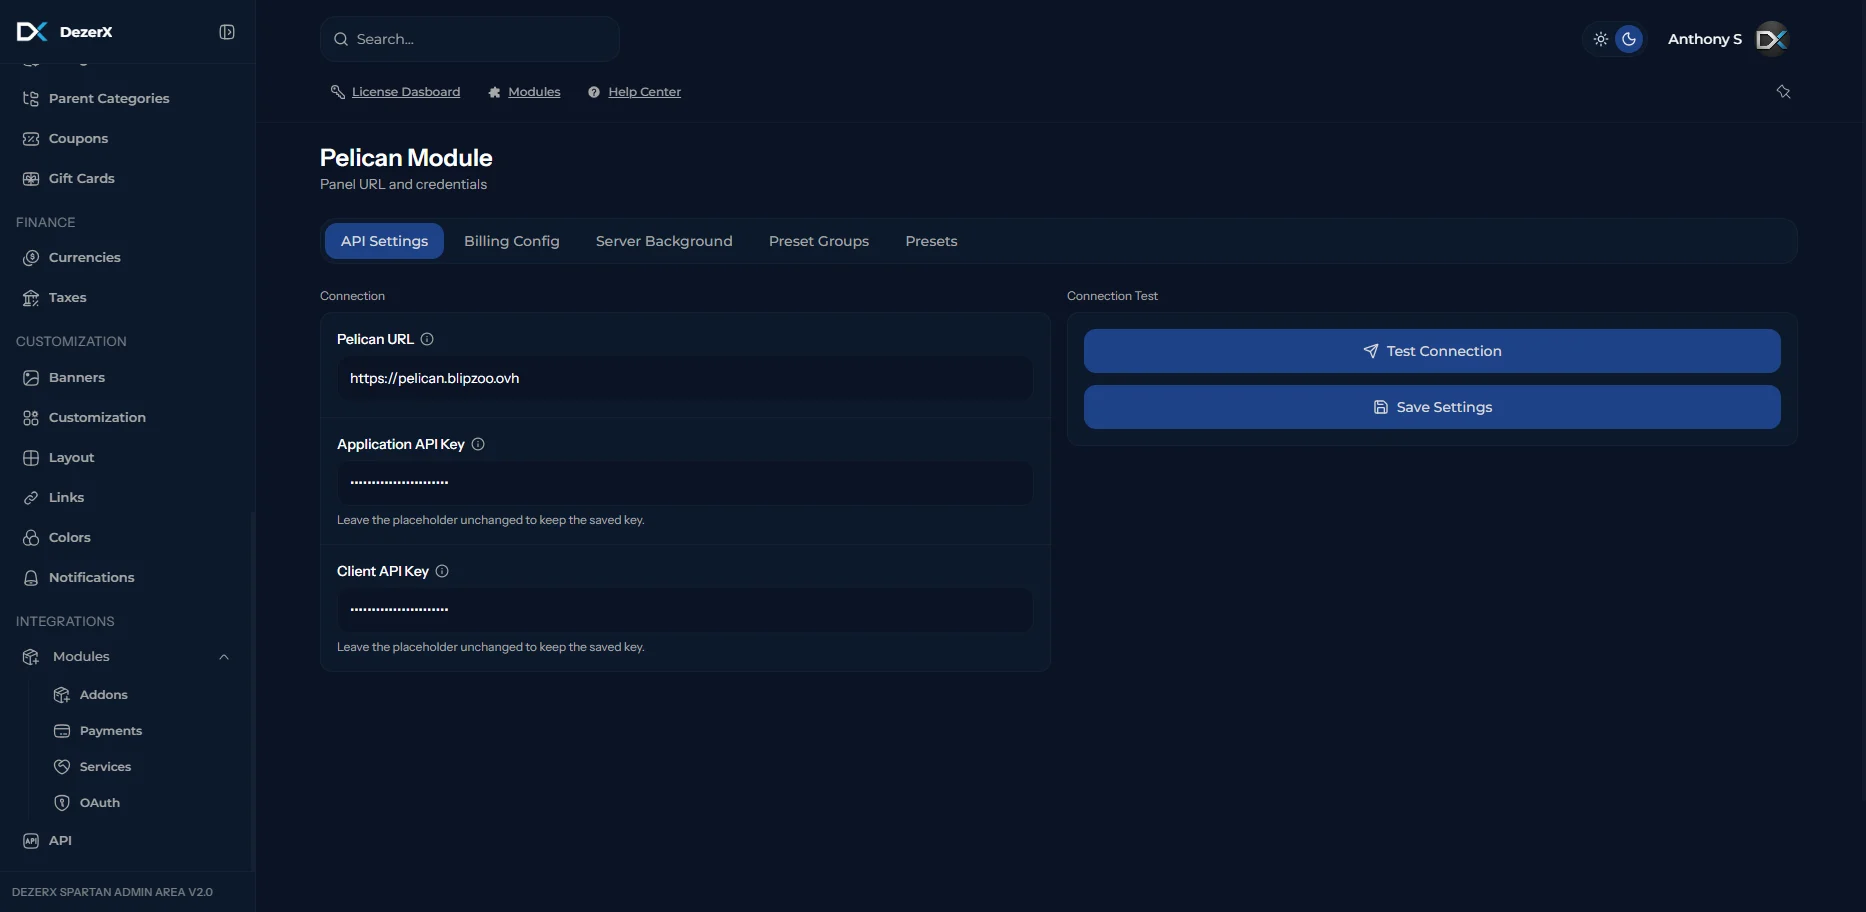
Configure Pelican in Spartan
- Paste the Application API key in the designated field.
- Paste the Client API key in the designated field.
- Enter your Pterodactyl panel URL.
-
Click the Test Connection button to verify the setup.
4
Configure the product
Use the product configuration options shown below: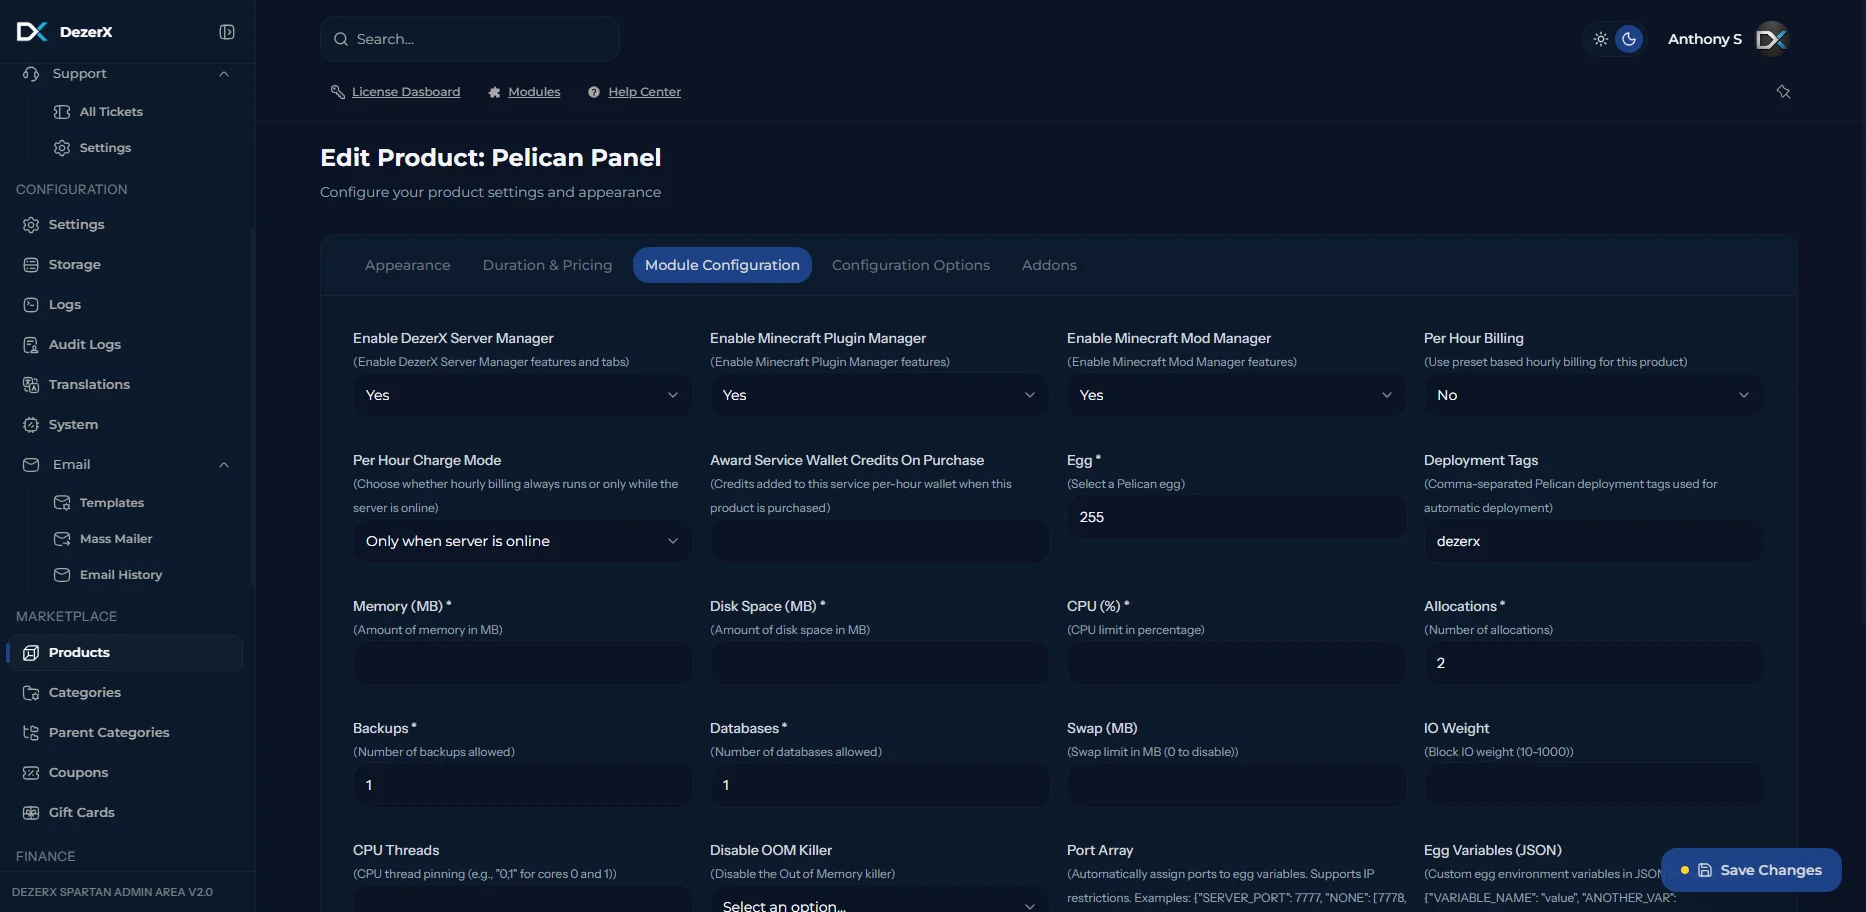
Troubleshooting
If you encounter any issues:- Verify that your API keys have the correct permissions
- Ensure your Pterodactyl panel URL is correct and accessible
- Check that the
allowed_originsconfiguration includes your Spartan dashboard URL - Make sure the Wings service has been restarted after configuration changes