Configuring Pterodactyl.
1
Open the Pterodactyl configuration
Open the Pterodactyl configuration file by running the following command:
2
Configure allowed origins
Find the following line in the configuration file:Modify it to include the allowed origins for Spartan:
Replace
https://dash.example.com and http://dash.example.com with your actual dashboard URLs.3
Restart Wings
After saving the configuration changes, restart the Wings service to apply them:
Configure Pterodactyl in Spartan
1
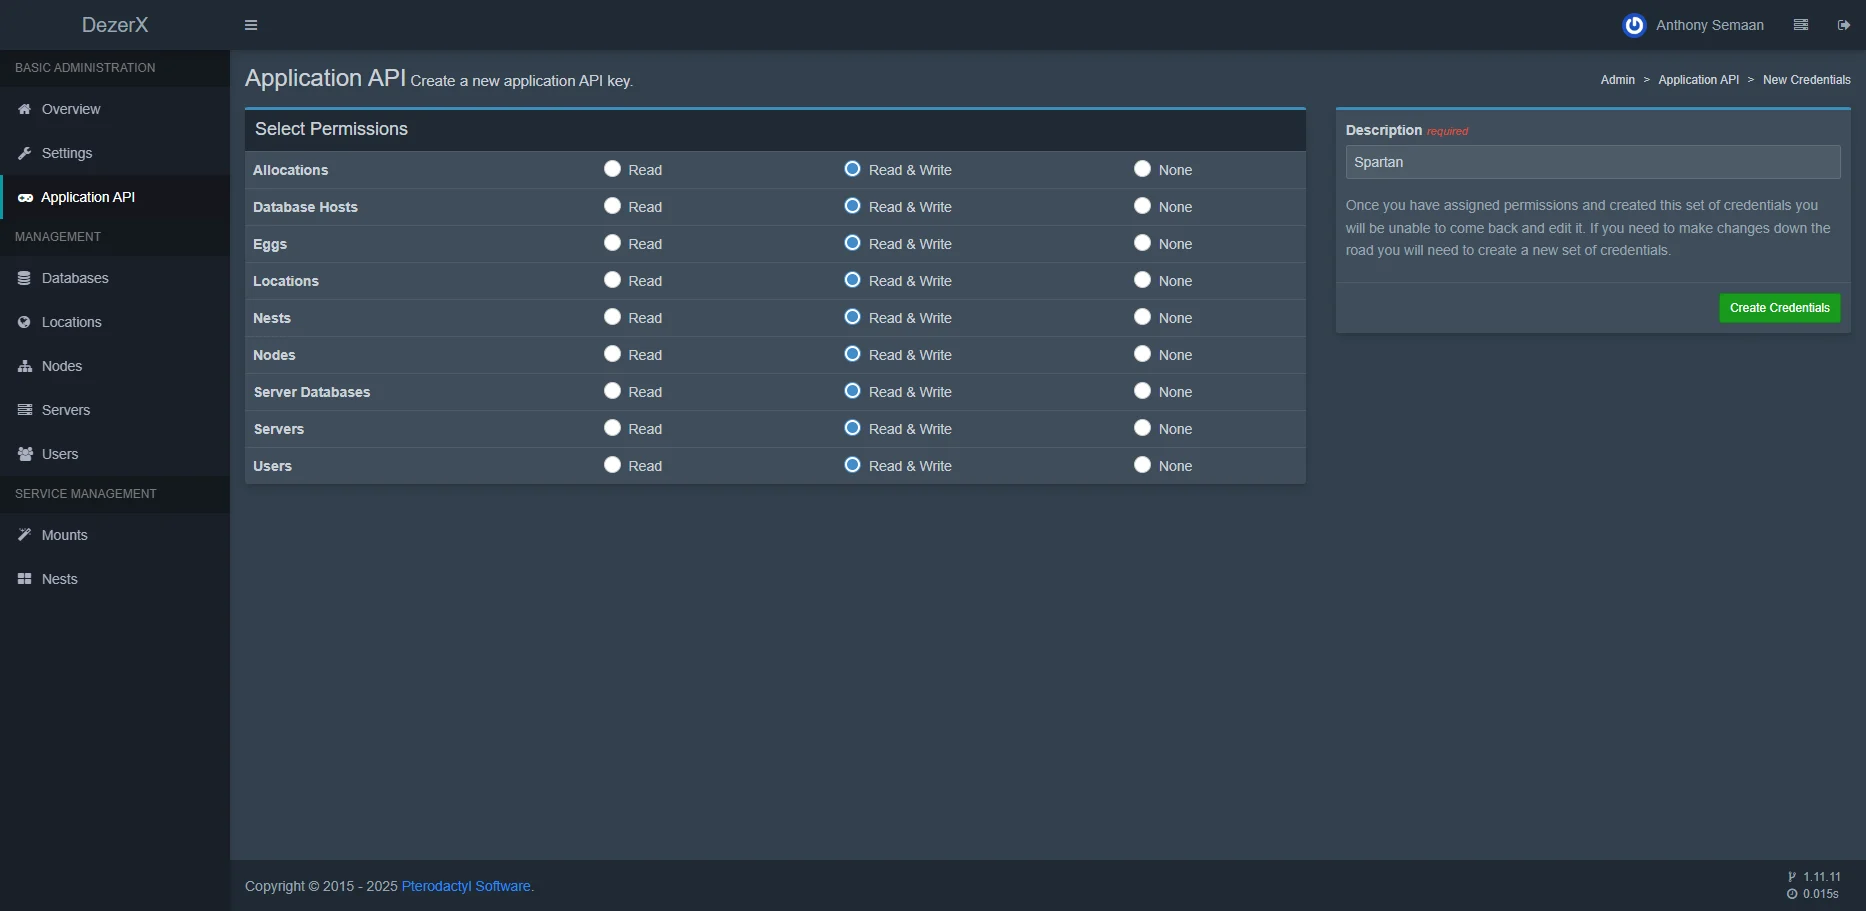
Get an Application API key
- In your Pterodactyl admin panel, navigate to the Application API section.
- Generate a new API key with appropriate permissions.
-
Copy the generated key.
2
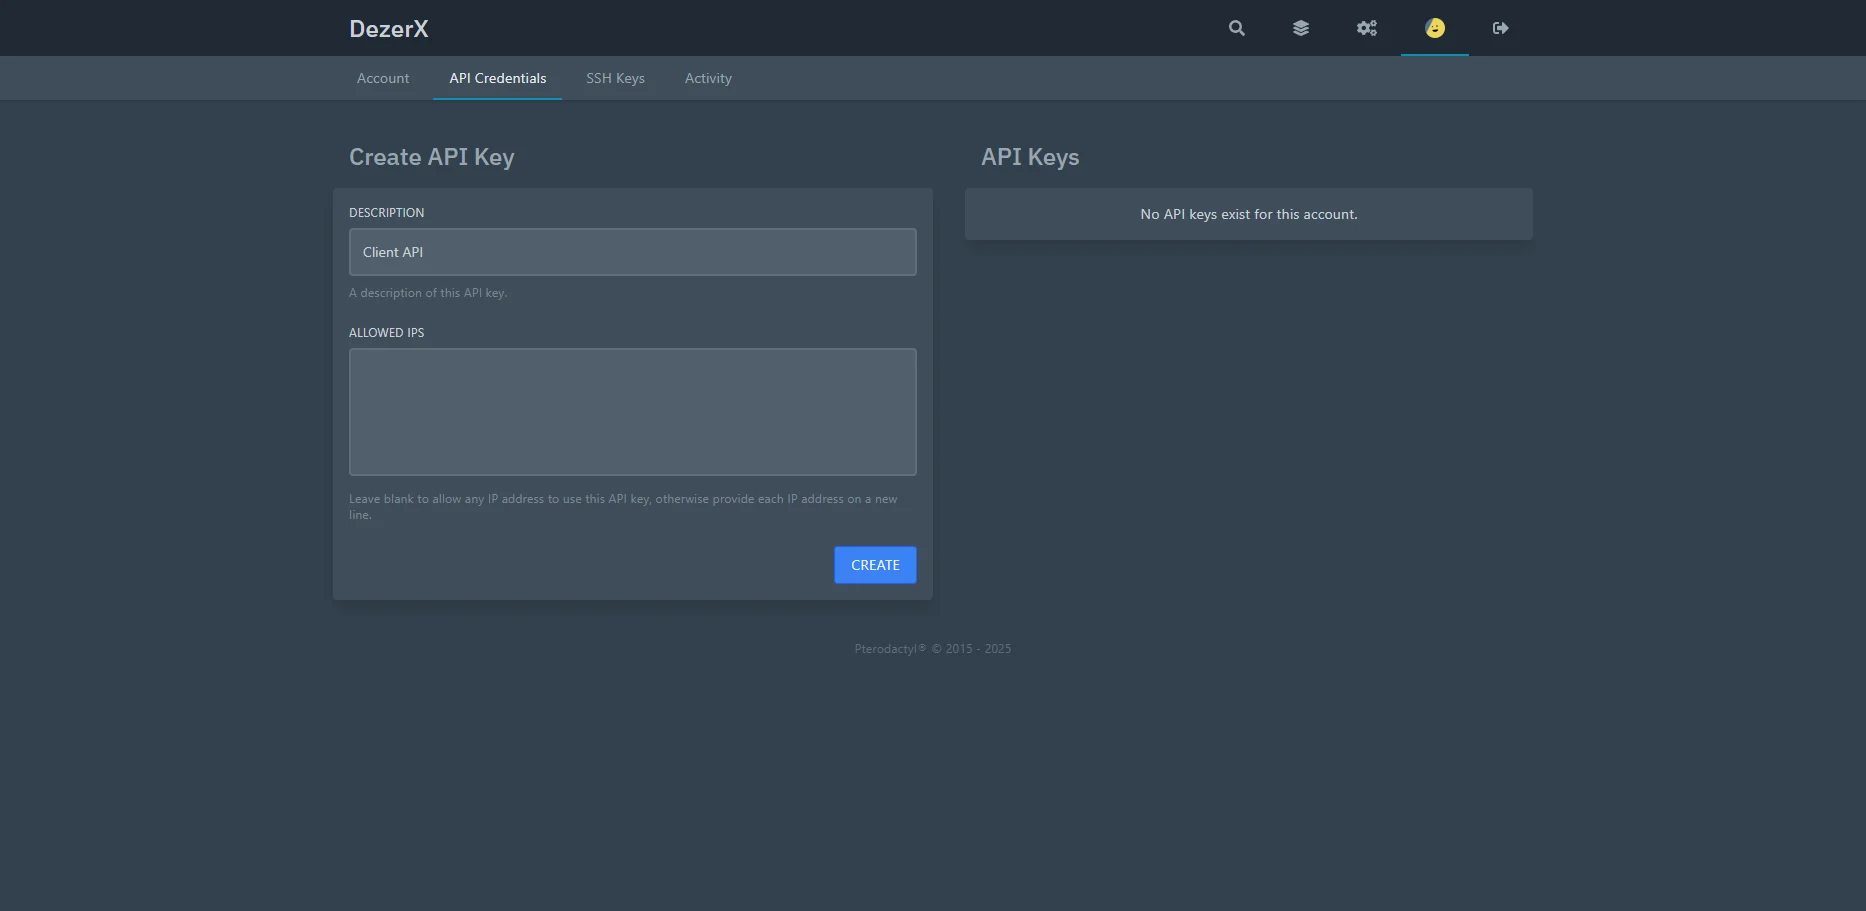
Get a Client API key
- Navigate to your Pterodactyl account settings.
- Go to the API Credentials section.
- Create a new client API key.
-
Copy the generated key.
3
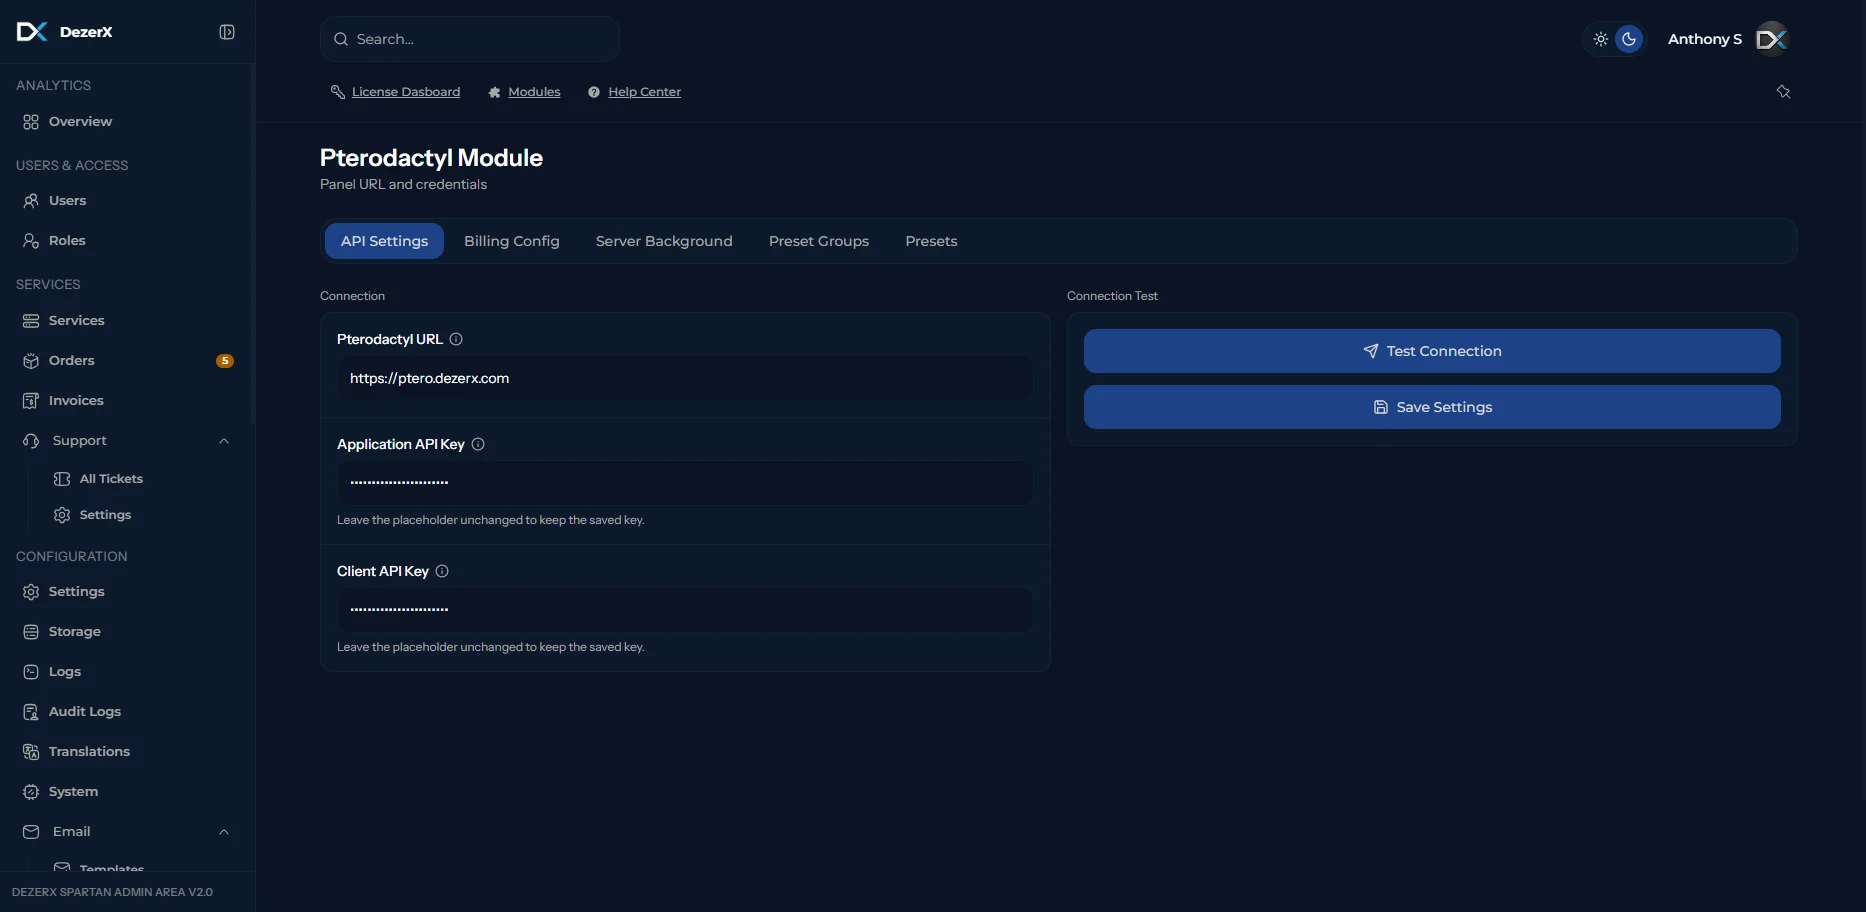
Configure Pterodactyl in Spartan
- Paste the Application API key in the designated field.
- Paste the Client API key in the designated field.
- Enter your Pterodactyl panel URL.
-
Click the Test Connection button to verify the setup.
4
Configure the product
Use the product configuration options shown below: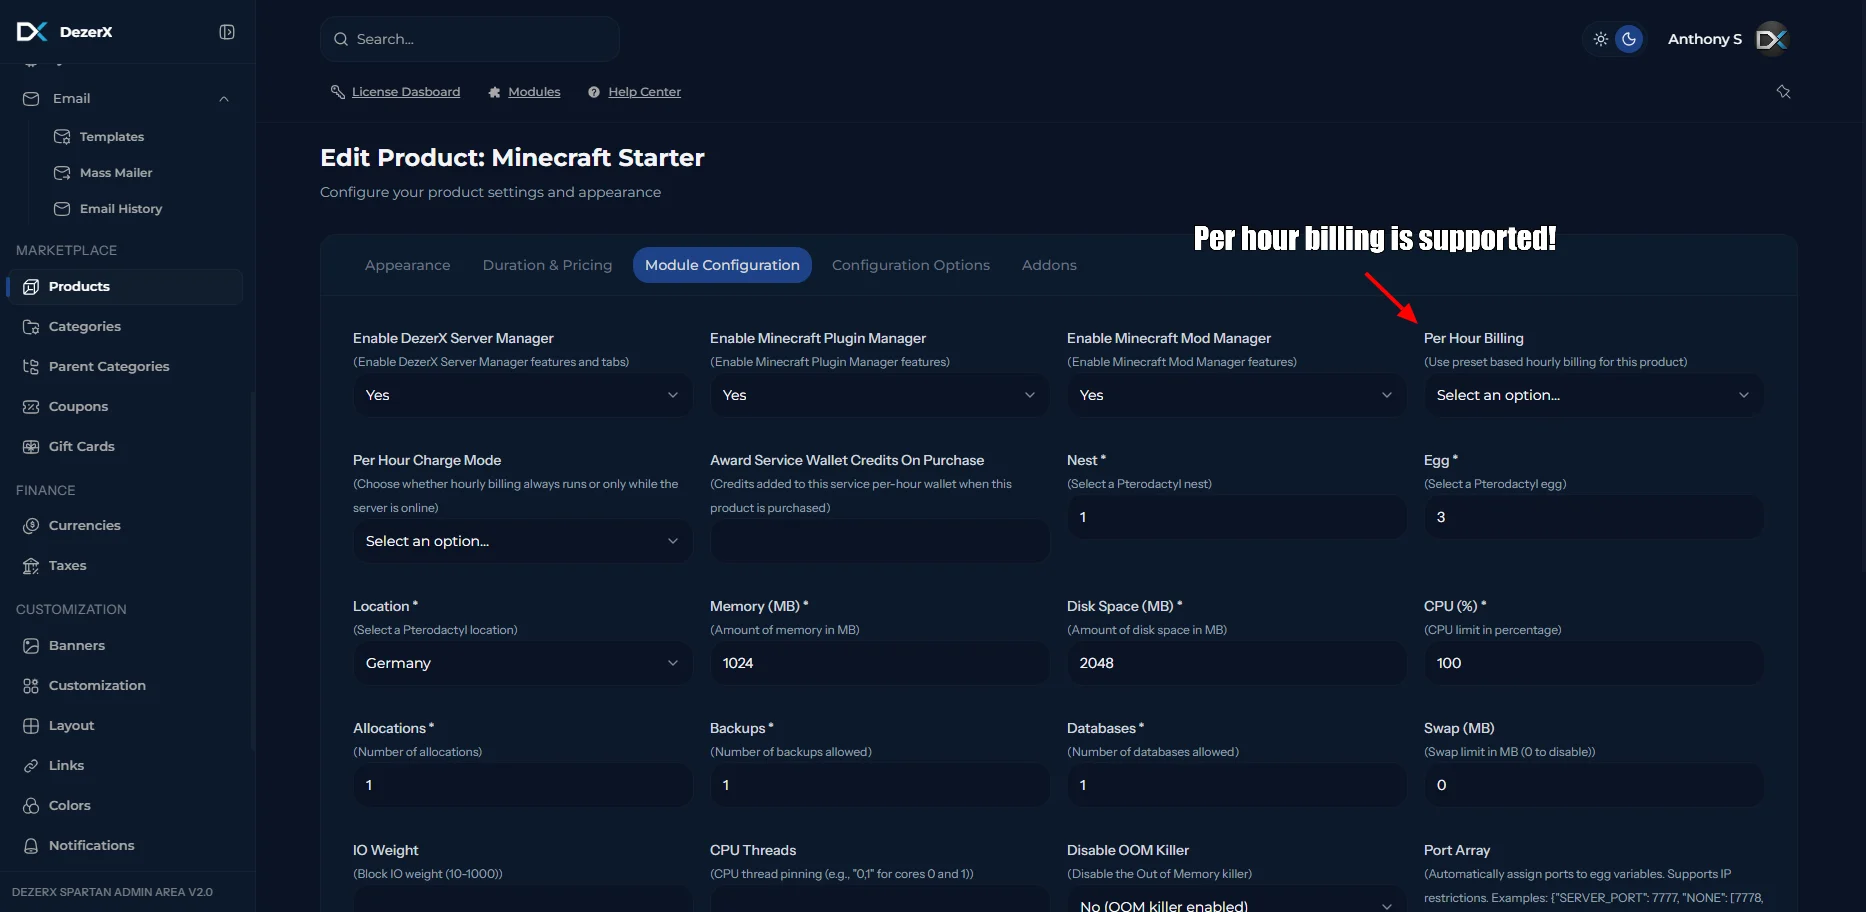
Troubleshooting
If you encounter any issues:- Verify that your API keys have the correct permissions
- Ensure your Pterodactyl panel URL is correct and accessible
- Check that the
allowed_originsconfiguration includes your Spartan dashboard URL - Make sure the Wings service has been restarted after configuration changes
Port Array Configuration Guide
Introduction
The Port Array feature allows you to automatically assign specific ports (and optionally restrict them to specific IPs) when creating Pterodactyl servers. This is useful for:- Reserving specific IPs for specific products
- Preventing IP conflicts between different products
- Managing multiple dedicated IPs on the same node
- Allocating multiple ports to a single server
Basic Concepts
What happens when you configure a port array?
- Ports are allocated to the server from Pterodactyl
- Environment variables are created for the egg (except for “NONE”)
- IP restrictions are enforced if specified
Port Allocation Fallback Logic
When a requested port is not available, the system uses a three-tier fallback strategy:- Try exact port first - Attempts to allocate the exact port you specified (e.g., 25565)
- Fallback to next higher port - If exact port is unavailable, finds the next available port higher than requested
- Sorts available higher ports in ascending order
- Selects the lowest higher port
- Example: If 25565 is taken, might allocate 25568, 25570, or 26668 (whichever is next available)
- Last resort - Allocates any available port on the node
- The system does NOT automatically increment by 1 (25565 → 25566)
- It finds whatever higher port is actually available in the node’s allocations
- With IP restrictions, the same logic applies but only considers ports on the allowed IPs
Two types of port assignments:
Syntax & Format
Basic Structure
Port Specification Formats
Note: All formats support automatic fallback to next available higher port if the exact requested port is unavailable.
String vs Array
-
String: Allocate ONE port
-
Array: Allocate MULTIPLE ports
Troubleshooting
Understanding Port Fallback Behavior
Question: “I requested port 25565 but got 25570 instead, is this a bug?” Answer: No, this is expected behavior! The system uses intelligent port fallback:- Tries exact port first (25565)
- If unavailable, finds next higher port (25570, 26000, 26668, etc.)
- Environment variable reflects actual port assigned
- 25565 ❌ (assigned)
- 25566 ❌ (assigned)
- 25567 ❌ (assigned)
- 25570 ✅ (available) ← System allocates this
- 26668 ✅ (available)
SERVER_PORT=25570 (not 25565, not 25566, but 25570 - the lowest available higher port)
When does it fail? Only when no ports are available on the specified IP(s), not just when the exact port is taken.
Error: “Could not find a port to assign”
Possible causes:- The specified IP doesn’t exist on the node
- ALL ports on that IP are already assigned (not just the requested port)
- No available allocations on the node at all
- Check Pterodactyl → Nodes → Allocations
- Ensure the IP is created and has any unassigned ports (fallback will handle different port numbers)
- Add more port allocations to the IP
- Use multiple IP options:
"192.168.1.100,192.168.1.101:25565"